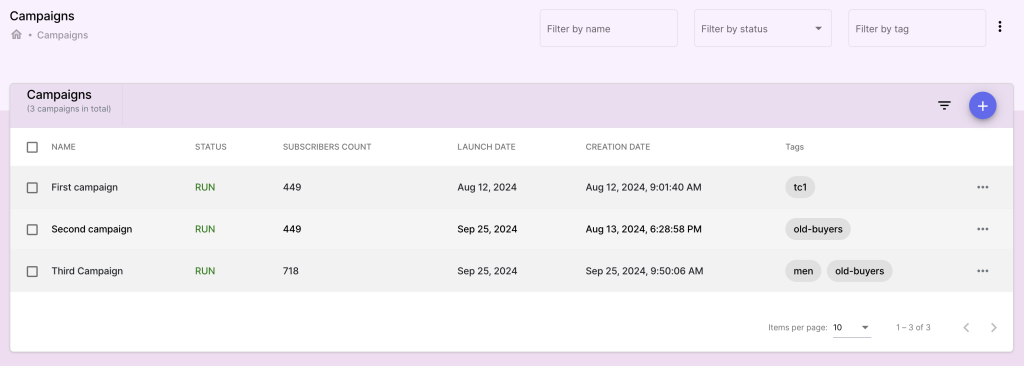
Description: #
The Campaigns section allows you to create and manage marketing or sales campaigns targeted at specific subscriber segments. Campaigns involve a series of defined steps, from setting up basic details to determining the logistics and media used for outreach. Once a campaign is created and launched, you can monitor its progress, review the targeted subscriber list (along with their Unique Campaign IDs), and export this data for further analysis or operational needs.
Steps to Create a Campaign: #
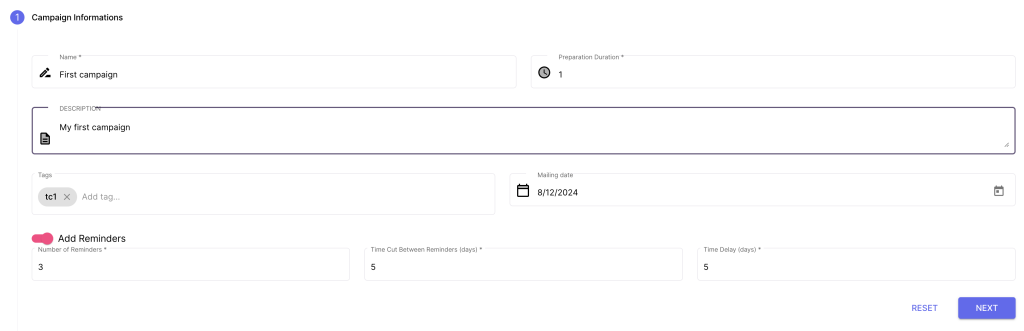
Step 1: Define Campaign Details #
In the first step of creating a campaign, you set up the foundational details that describe the campaign and its timing.
Campaign Name:
- Enter a descriptive name that summarizes the purpose of the campaign (e.g., Winter Sale, Loyalty Program).
Description:
- Add a brief description to further detail the campaign’s objectives, products being promoted, or target audience.
Duration of Preparation:
- Define how long the campaign will be in the preparation phase before it’s officially launched.
Reminders:
- Indicate whether the campaign will have reminders, and if so:
- Number of Reminders: Specify how many reminders will be sent.
- Time Cut: Define the time at which a reminder will be sent.
- Time Delay: Set the delay between each reminder (e.g., reminders every 7 days).
- Indicate whether the campaign will have reminders, and if so:
Step 2: Define the Population (Segments and Profiles) #
In this step, you will define the population that will be targeted in the campaign by selecting a segment for each pricing profile.
Choose a Segment:
- For each pricing profile (e.g., Retail, Wholesale, VIP), choose a predefined Segment that will filter the appropriate subscribers for that profile.
- This allows you to target different pricing tiers with personalized content and offers.
Segments Based on Profiles:
- Each segment might represent different population rules (e.g., high-spending customers, geographically focused groups, inactive subscribers).

Step 3: Define the Media #
The third step involves associating the campaign with the appropriate Media.
Select a Media:
- Choose from the media collections that have been created in the Media section. This defines which products and packages will be featured during the campaign.
Review Media Content:
- Ensure the selected media is aligned with the objectives of the campaign and the targeted population.

Step 4: Define Logistic Services Suppliers #
Logistics is an important aspect of ensuring successful order fulfillment. In this step, you define which logistic service suppliers will be used.
Choose Suppliers:
- Select the logistic service providers that will handle shipping and fulfillment for the campaign’s orders.

Step 5: Define the Commercial Address #
Finally, define the commercial address that will be used for campaign-related communications and operations.
Select Commercial Address:
- Choose or enter the commercial address where orders will be processed or from which shipments will be made.

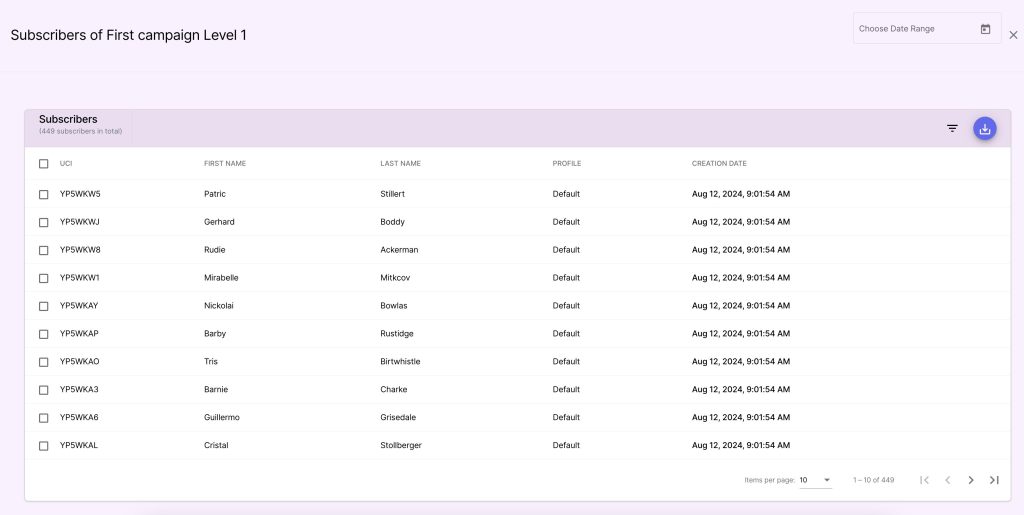
Review Subscriber List and UCIs: #
View Subscriber List:
- After launching, you can view the list of subscribers targeted in the campaign.
- For each subscriber, their Unique Campaign ID (UCI) will be displayed, allowing you to track participation and engagement at an individual level.
Export Subscriber List:
- You can export the list of subscribers and their UCIs to an external file (e.g., CSV or Excel), which can be used for reporting, follow-ups, or integration with other systems.
Benefits: #
- Structured Campaign Setup: The multi-step campaign creation process ensures all important aspects, from population to logistics, are clearly defined.
- Tailored Campaigns: Assigning segments to different pricing profiles ensures the campaign content and offers are targeted to the right groups.
- Comprehensive Management: From the moment a campaign is saved and launched, you can monitor subscriber participation, view their UCI, and export data for detailed reporting and analysis.


